Pages

Showing posts with label thinkingofyou. Show all posts

Friday, 17 May 2024

Multi-Stamping with Stamp and Spin Tool


Here’s some tips for using multiple images and colours to make stamping with the tool faster!

1. put flower stamp on tool door, stamp, turn, stamp 2. put flower center stamp on flower image, pick up with door 3. ink both stamps with different colours, turn and do two images like this 4. add leaf to first flower, pick up with door 5. ink all stamps with different colours, turn and do 5 images like this 6. remove flower stamp, do 2 turns with flower centre and leaf 7. remove flower centre stamp, do 2 turns with leaf 8. stamp sentiment 9. finish card.


Friday, 12 April 2024

Old Favourites, New Ideas!


Recently I completely re-organized my stamps, dies, stencils and embossing folders, both physically and electronically, and while I was doing that, I came across some old items that I've been holding onto but not using. I decided to challenge myself to use a few  of them, in a new way to decide whether it was time for them to go to a new home.

If you want to know more about my reorganization as well as why (and how!) I changed from Evernote to Air Table, join us at the FREE Paper Crafters Get Organized Summit next weekend!


Saturday, 17 February 2024

Shimmery Thinking of You


Welcome to this week's LIMES inspiration post!

I chose this card as my inspiration from the gallery of this week's Splitcoaststampers' Featured Stamper!


LIST: Colours (blue, brown, copper, cream) Techniques (die cutting, stamping) Elements (flourish, daisy, die cut flower with circle frame, ribbon)

INCLUDE: blue, copper, die cutting, circle frame

MODIFY: water stamped background, stencilled daisy, one daisy, added sentiment

EXCLUDE: ribbon,

SPIN:

I was really attracted to the tone-on-tone look of this card, even though it has more than one colour. I started by blending a panel with blue and orangey-brown, and then masked a circle and water-stamped with a background stamp. 

I stenciled my daisy with Lisa Horton Interference ink (shimmery ink that changes colour depending on what's underneath it), and added a heat embossed sentiment.


Friday, 22 September 2023

Stamp Positioner Show Down


Today, I'm sharing my thoughts on my 4 stamp positioners - which one is best? Watch here to help you decide!


Saturday, 12 August 2023

Thinking of You Poppies


Welcome to this week's LIMES inspiration post!

I chose this card as my inspiration from the gallery of this week's Splitcoaststampers' Featured Stamper!

 LIST: Colours (orange, yellow, red, teal, white, black), Techniques (stamping and watercolouring), Elements (poppies, snow, thank you stamped  sentiment, teal/blue edge, watercolouring with a loose feel).

INCLUDE: orange, yellow, red, teal, white, poppies, teal blue edge

MODIFY: stenciling, spritzing technique instead of stamping and watercolouring, gold splatter instead of white, thinking of you sentiment higher on the card, trimmed panel down to leave white border


Micheline's work is absolutely stunning - she uses stamped outlines and watercolours to create little pieces of art that look hand-drawn and painted!

I had a crazy idea that I would stencil some poppies, blend a blue background and then spritz water over the whole thing to get it moving. AND IT WORKED! lol!

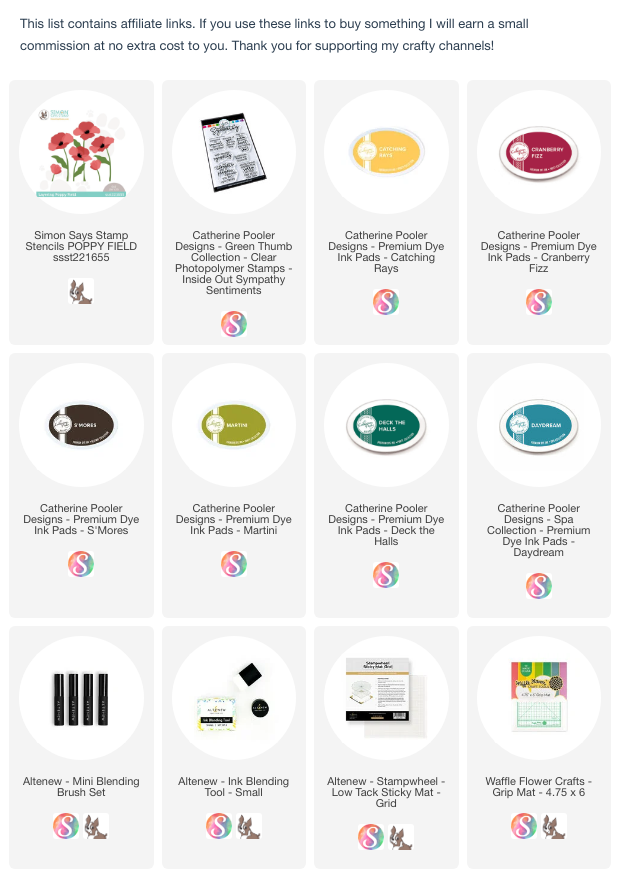
I used a Simon Says Stamp layering stencil set, and masked it off so that I only had two of the poppies showing. I blended yellow and red and brown ink onto the petals, and then two shades of green on the stems and leaves. 

Then it was time to spritz it all with water to get that 'loose' look that Micheline had. And I'll be honest. I was scared! lol!

It started moving and then it kept moving and I grabbed my heat gun to dry it before it lost all the details. The colours did get a little paler with the water, but I think it's still really pretty.

Once it was dry, I splattered gold watercolour over top and then stamped my Catherine Pooler sentiment.


Friday, 31 March 2023

Mad For Plaid!

 
Today I'm trying out 10 different ways to get the look in your cardmaking from some DIY options to the latest tools. and here's a spoiler alert - some are more successful than others.....


Saturday, 4 March 2023

Blue Coneflowers


 Welcome to this week's LIMES inspiration post!

I chose this card as my inspiration from the gallery of this week's Splitcoaststampers' Featured Stamper!

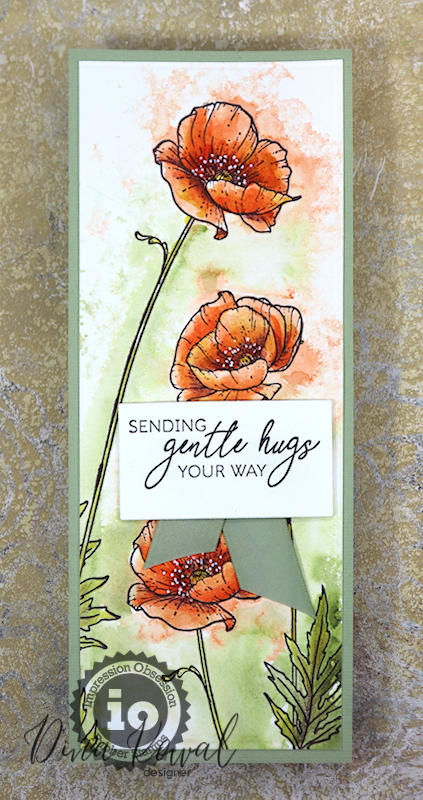
LIST: Colours (red, green, white), Techniques (misted watercolour), Elements (3 flowers, leaves, slimline, hugs sentiment)
INCLUDE: flowers

MODIFY: blue instead of red, die cut instead of stamping, inkblending instead of watercolour, white splatter instead of white gel pen highlights

EXCLUDE: sentiment

SPIN:


I love the loose watercolour look of Dina's flowers! The soft bleed of the colours onto the background is so pretty! 

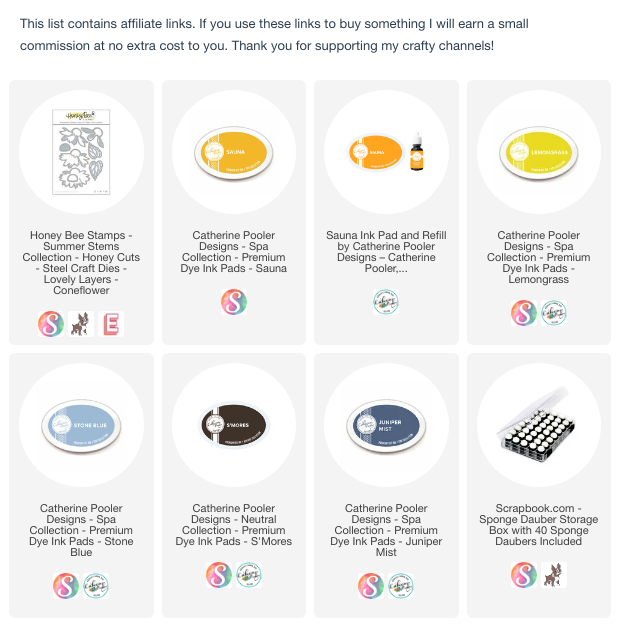
I have this coneflower die set from Honey Bee Stamps - it was one of those 'I MUST HAVE THIS' items at the time, but I haven't used it much after that initial honeymoon period. lol! I dug it out and blended ink onto just some of the layers. My blending was very patchy, in two colours of yellow for the centres (plus brown) and two colours (plus a yellow-green) for the flowers and leaf. I drew the stems with a black marker.
I spritzed water onto the flowers and leaves, and lifted some of the colour. Then I splattered white acrylic paint, navy ink and gold watercolour on the flowers and also onto a panel of white cardstock and navy cardstock. I cut a narrow frame from the navy cardstock to go around the white panel.


Monday, 2 January 2023

Craft Roulette #144 - Thinking of You


I was the guest on Craft Roulette last Friday (my 9th time!!) and it was so much fun! Craft Roulette is a live crafting challenge where wheel spins decide the parameters of our project. Luck was with me this time! 

Project: Card for someone special

Colours: Christmas Tree

Element: Wreath

Random: Hand-drawn border


I used greens, teals and yellow to make my wreath using my Stencils 360 tool and the Mandalas stencils. 

If you watched on Friday night, you saw me cut my sentiment from gold metallic cardstock, but it really disappeared in the busy-ness of the stencilled wreath:


So I added another layer that I had swiped Uptown ink onto.

I used a scrap of Inca gold cardstock to make some little round embellishments with a polka-dot cover die. I placed them on each point of my wreath

I used a Karin marker for my squiggly border and added some Emerald gems from Crafty Meraki.


Friday, 21 October 2022

Cardmaking Trends


What do you think of the latest card making trends? Here's a few that I've tried:


Sunday, 25 September 2022

LIMES: Thinking of You


Welcome to this week's LIMES inspiration post!

I chose this card as my inspiration from the gallery of this week's Splitcoaststampers' Featured Stamper, Crystal!

LIST: Colours (White, black, pink, green, aqua), Techniques (stamping)
Elements (floral background, black frame, black dots, rectangle sentiment strip, 3 gems)

INCLUDE: floral background, black frame

MODIFY: technique (watercolor), splatter (gold instead of stamped black dots), colours (added yellow, orange and purple), stamped sentiment on die cut shadow, orientation

EXCLUDE: black dots/splatter

SPIN: negative frame

I love Crystal's Rennie-type roses and the way the coordinating 'coloring' stamps appear to be scribbled. I thought it would be fun to see if scribbling in similar flowers with watercolour would give me a good result. It didn't.

I'm not a great watercolourist, and when I'm practicing a technique, I always find it helpful to have back-up plans in case things don't end up where I want them. My original intention was to watercolour the flowers and leaves, and then add black splatter. When I was finished painting, I wasn't really happy with how the flowers looked, and I really didn't like the contrast to the white background. Instead of throwing it out, I spritzed a ton of water over it all and got the colours moving, creating a looser, more dreamy look.


Monday, 15 August 2022

Crafty Meraki Video Hop (& Glimmer Giveaway!)


I love the look of Clean and Simple cards. But I also love to try techniques, and some of them can get pretty messy. 


Today's video shows 4 ways to use watercolour powders and then how I used the panels I created with these messy techniques to make clean and simple cards.


This video is part of a video hop to celebrate the latest Crafty Meraki release, and they are giving away a Spellbinders Glimmer hot foil machine to ONE randomly chosen lucky winner! Head to my video here and then hop and comment for a chance to win!


Sunday, 26 June 2022

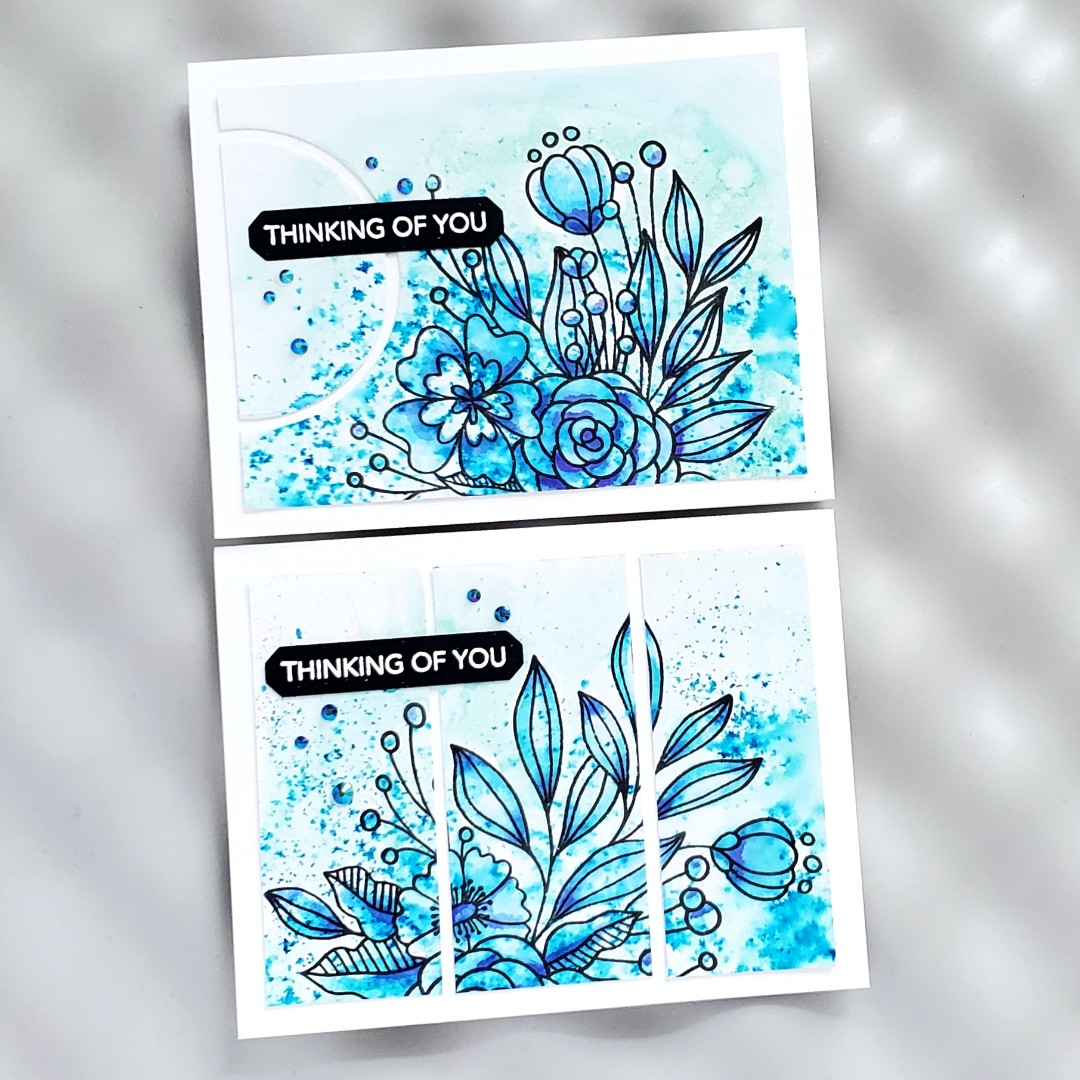
Thinking of You (in Blue)

Congratulations to this week's Featured Stamper, CAR372.

I chose this card as my inspiration:

LIST: Colours (green, black, white), Techniques (die cutting, stamping), Elements (botanicals with black outlines, 3 panels, semi circle sentiment strip, gems)

INCLUDE: Monochrome colour scheme, botanicals with black outlines, 3 panels, semi circle element, gems

MODIFY: green to blue, stamping and watercolouring instead of die cuts, 2 cards, orientation of cards, 

EXCLUDE: Die cut leaves

SPIN: 2 for 1 design


I started by stamping my floral image on a piece of watercolour cardstock and then coluring it in with Karin markers (any watercolours you have will do, I just wanted to practice with these). I used 3 blues and a deep indigo to add colour.

Then I spritzed the whole panel with water, and sprinkled some blue watercolour powder over top to create my background. 

I cut the panel in half and then cut out a half circle frame from one, and trimmed the other into 3 panels. I finished with a Taylored Expressions sentiment and some Crafty Meraki gems.


Friday, 25 March 2022

Getting More from Basic Stencils


Sometimes we may feel like simple tools and shapes aren't all that exciting, especially when there are so many really unique and beautiful products for sale. But investing in good basics in your craft room provides you with versatile building blocks that can be used on their own or together with the more specialized goodies for great cardmaking designs!

In today's video, I'm sharing 8 different ways to use the Simple Hill Edge 2 Stencil from A Colorful Life  Designs. 


Monday, 7 March 2022

One Stencil, Two Looks!


 I had some fun just playing with a stencil this weekend, trying different mediums to get different looks. 

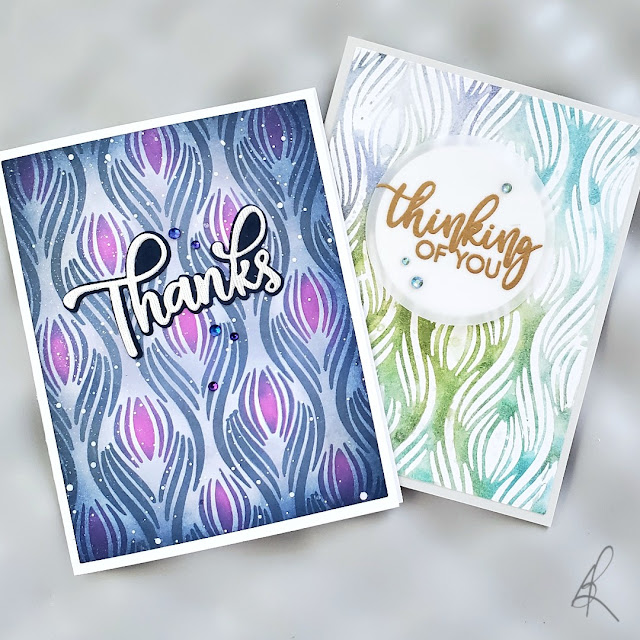
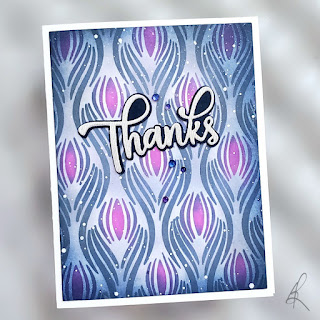
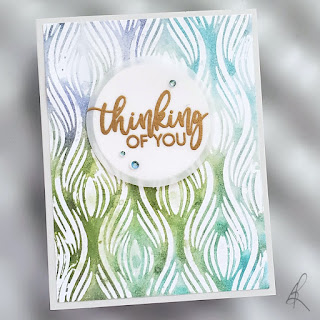
For this one, I used targeted ink blending through the stencil and then added more ink blending after I removed the stencil. I also splattered some white ink over it. I love the art-deco feel of this one, and I finished it with the Thanks Shadow die cut from SugarPea Designs.


For this one, I used my gel plate, and some shimmer spray. This technique was similar to my video from a couple of weeks ago but I added a stencil into it to get the watercolour look along with a pattern.  I finished this one with a Waffle Flower sentiment heat embossed onto a vellum circle.  I backed the vellum with a white cardstock circle that was smaller and popped it up. 


Sunday, 20 February 2022

Striped Hugs


 Congratulations to this week's Featured Stamper, Lynn. 

I chose this card as my inspiration:


LIST: Colours (gray, black, white, red, beige), Techniques (stamping, die cutting) Elements (hearts, encouragement theme, stripes of patterned paper between the sentiment strip and its red mat), black dots, hands

INCLUDE: colours (gray, black, white, red), horizontal stripes, hearts, black die cut sentiment in lower right of card with red frame behind white

MODIFY: heart shaped sentiment strip, add yellow and blue, stripes all over panel

EXCLUDE: patterned paper, background stamping

SPIN: square card

The strips were created from backgrounds I made earlier this week and I cut them in different widths to create my panel.

I cut two hearts - one white and one red and offset them to create a partial frame. I finished with multicolour/sized gems for some sparkle.


Thursday, 10 February 2022

Trying New Techniques at the Card Maker Success Summit


Today I'm sharing two cards I made with my favourite technique that I learned from one of the speakers at last year's Card Maker Success Summit. I love clean and simple techniques, but I also love to get messy every once in a while and these two cards involved layers of Distress Oxide Sprays, lots of water and then some heat embossing over the top. (isn't it interesting how the colour of the embossing changes the overall look of the cards - the gold one seems much 'greener' than the white one, but they're both from the same panel!)

The next Card Maker Success Summit starts exactly 1 week from today, and it's full of even more fun techniques to learn and try - I can't wait to learn from the 24 other amazing speakers that will be sharing their knowledge of techniques!

It's free and there are already so many people signed up - it's going to be a blast! I hope we'll see you there!

Click here for more information!

Sunday, 23 January 2022

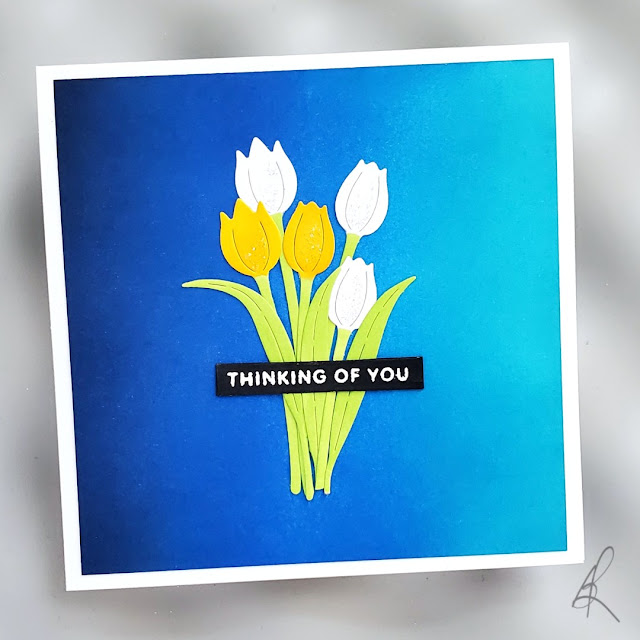
Thinking of You

Congratulations to this week's Featured Stamper, ME! What a wonderful surprise and honour! 

I went way back to 2012 to choose my inspiration:

LIST: Colours (aqua, blue, green, white, yellow), Technique (ink blending, heat emboss resist), Elements (daisies, yellow dots, white frame, tall green stems)

INCLUDE: Colours (blue, green, white, yellow), ink blending, yellow and white flowers, white frame, tall green stems

MODIFY: inkblending is vertical, rather than horizontal, flowers are tulips, not daisies, die cuts rather than stamped, grouped together rather than spread out. Added a sentiment, heat embossed the sentiment rather than the flowers

EXCLUDE: resist, texture on the background

SPIN: square card, stickles

So in 10 years, I'm happy to say that I think I'm better at inkblending! lol! 

I used my 5 rules for getting a smooth blend:

1) smooth cardstock  I use Hammermill 100lb Digital Color Copy Cover

2) blending brushes (I find these easier than blending foams) 

3) juicy ink pads (Catherine Pooler inks are my go-to!)

4) lots of colours - there are 5 colours on this panel. It's easier to blend colours that are close together

5) lots of layers of ink - this cardstock was quite saturated with ink by the time I was finished!

The tulips and leaves were die cut from white cardstock and coloured simply with Copic markers.

(Click here for Jan 31, 2012 blog post)