Pages

Sunday, 27 June 2021

Get your FREE ticket to the Card Maker Success Summit!

I'm so excited to share that I am going to be part of a brand new, free 4-day Christmas card making event!


 click here to get your    FREE TICKET!


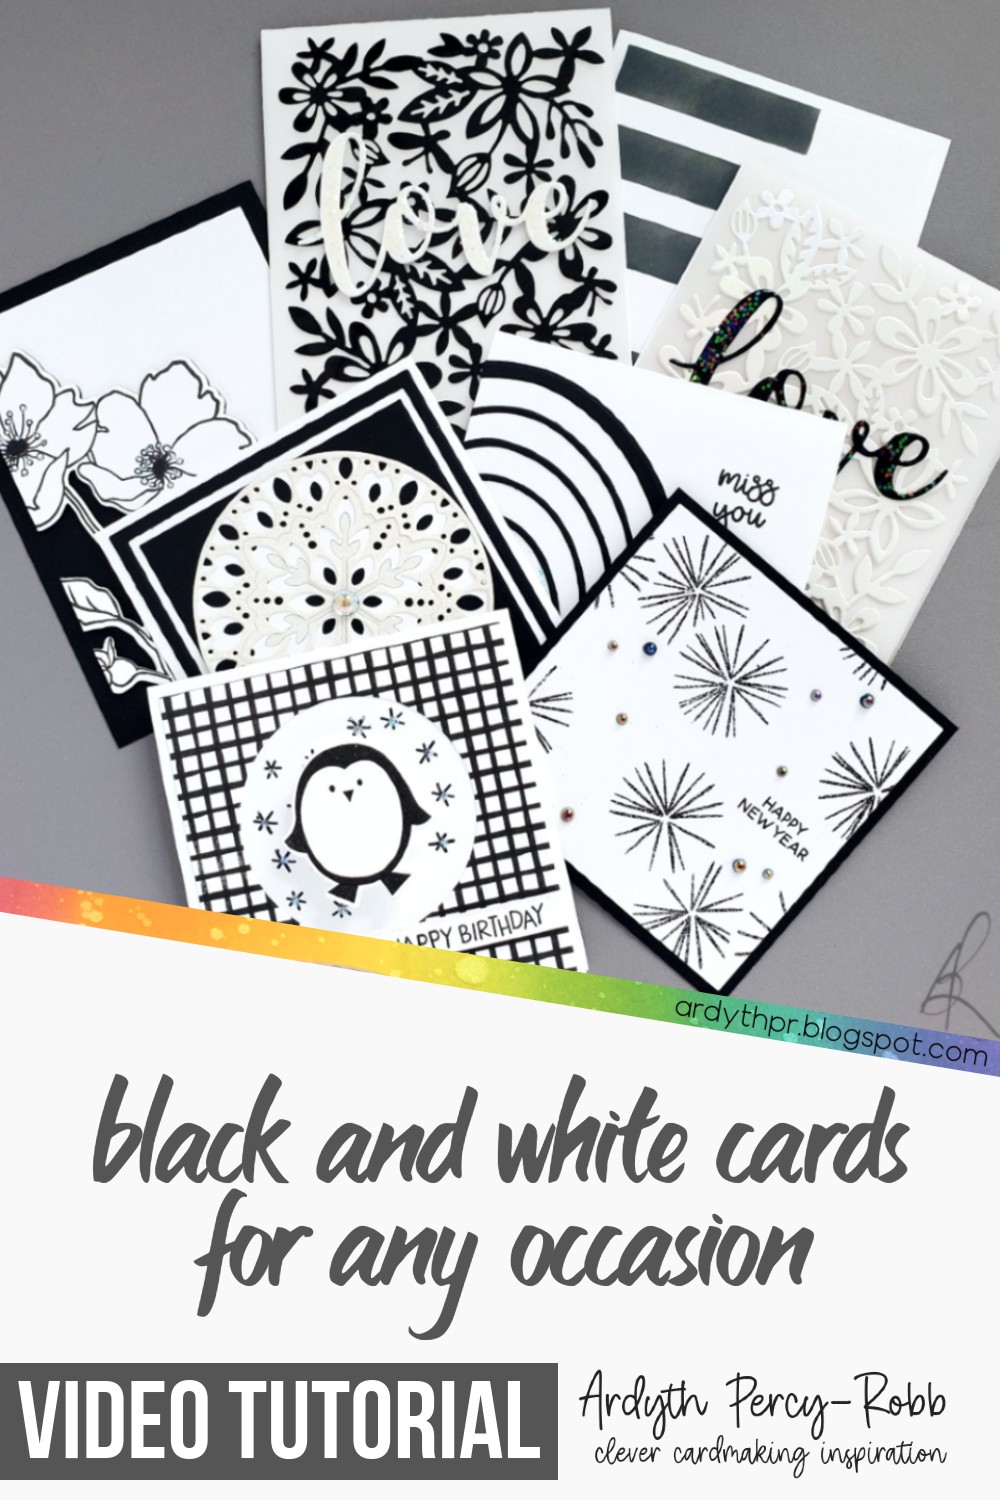
My topic is Magnificent Multiples in Minutes - packed with tips for getting lots of Christmas cards done FAST!  (see these 24 cards? less than 2 hours! and I'm going to show you how you can do it too!).


Here's a quick overview of the Card Maker Success Summit!

  • The summit will run from July 15th  through July 18th.

  • Each day will be packed with amazing speakers who are ready to help you create a card making plan that will minimize stress, let you get your cards done early and create beautiful professional hand crafted cards that will WOW your friends and family.

  • We’ve got a pop-up Facebook group where you’ll find crafting friends, connect with other card makers, ask the speakers questions, and whatever else we come up with!

  • You can attend the summit absolutely free, but you can choose to grab the VIP All-Access Pass at any time. The VIP All-Access Pass will give you an all inclusive pass to the summit PLUS:

    • Ongoing access to 30+ presentations

    • 60+ page workbook

    • Virtual Card Making Crop over Zoom 

    • Chance to win an exclusive giveaway

    • Premium bonus content from our speakers including svg files, courses, free memberships, exclusive discounts and more 


The VIP All-Access Pass is currently being offered at a special price, and it will disappear for good once the summit is over, so start thinking about it now!


Kaleidoscope Snowflake

Congratulations to this week's Featured Stamper, Angie (APMCreations).

I chose this card as my inspiration:


LIST: Colours (blue, green, white), geometric die cut background, stamped flowers with vellum leaves, hello theme, white embossed sentiment on strip/banner

INCLUDE: colours, vellum, geometric background,         

MODIFY: occasion, background heat embossed/watercolor powders rather than die cut, 

EXCLUDE:

SPIN: negative die cut circle frame

I'm gearing up for Christmas in July, and I created my background by heat embossing a background stamp onto watercolour cardstock with white embossing powder, then sprinkling watercolor powders over top and spritzing it, letting the water and pigment just kind of land where it landed. I used blue and yellow powders, and I love how they give such amazing variation in colours. When the panel was dry I cut a circle from it using Ellen Hutson's Essential Circles dies, which also cut a narrow frame which I left out to create some negative space.

I cut the snowflake from white cardstock and also from holographic vellum. I glued the vellum snowflake onto the card then offset the white one before gluing it down. I added a simple Joy sentiment and some Dewdrops.

Friday, 25 June 2021

10 Favourite Cardmaking hacks from Friends!


Today's video is a collaboration with my friend Gerry - we've teamed up to share our favourite cardmaking hacks that we've learned from our crafty friends - I've got 5 (and a bonus!) and Gerry's got 5 as well! Give them a try and see if they work for you!

Start with my video here:


Tuesday, 22 June 2021

Congratulations in Blue


It's graduation season and this is a card I made for my friend's daughter. She didn't want her 'ugly' school colours, just her favourite blues. 

I created this background with my gel plate, some Catherine Pooler inks and a Hero Arts stencil. I can't remember exactly how I did it, so this one is truly unique! Check out the 3D 'texture' on this flat background! 

I finished it with a square negative frame and a heat embossed Altenew sentiment.


Sunday, 20 June 2021

Floral Happy Birthday

Congratulations to this week's Featured Stamper, Sandi (SandiMac)!

I chose this card as my inspiration:

LIST: colours (red, green, blue, beige, white), rectangular frames, florals, heat embossed stamped thanks sentiment

INCLUDE: florals, colours, rectangular frame        

MODIFY: just one, negative frame, watercoloring instead of repeat stamping, die cut under the stamped/embossed sentiment, 

EXCLUDE: one of the frames    

SPIN:


I heat embossed the background stamp onto watercolour paper, and then watercoloured it in layers, building up colour in the shadow and overlap areas.

I cut it with rectangle dies to create a negative frame.

I stamped the sentiment onto pearlescent vellum, and then heat embossed it with Cloud 9 embossing powder, which is kind of a sparkly silver with a pink tint to it. I die cut it with the coordinating die, and then glued it to another die cut which I had cut from Neenah. I popped it up with foam tape.

Wednesday, 16 June 2021

HOT Summer Geo-designs (and Pretty Pink Posh blog hop!)


Good morning! I'm excited to be part of the Pretty Pink Posh blog hop this morning, with some summery, geometric cards!


I focused on a couple of the new stencils with simple square and circle shapes and came up with 5 very different looks. Here's a link to my video:


BLOG HOP DETAILS:

There are 3 $25 gift certificates up for grabs (one winner each day of the hop - today is Day 3). Winners will be picked randomly along the blog hop. 

Comments must be left by 11:59 PM PST on 6/20/2021. 

Winners will be announced on the PPP blog.


Saturday, 12 June 2021

Modern Merry Christmas

Congratulations to this week's Featured Stamper Laura! (ScrappyHappy)).

I chose this card as my inspiration:

LIST: colours (pink, green, aqua, grey, red), layered die-cut, ink-blended circular flowers, stamped sentiment strip

INCLUDE: colours, circle shapes,

MODIFY: circle baubles instead of flowers, Christmas

EXCLUDE: Sentiment Strip

SPIN: Square card, sparkly holographic cardstock


I was attracted by the deep colours and dimension and blending on this pretty vertical garden.

I used the bubble mania die and inkblended the oval pieces that cut out of the bubble outline, leaving a white highlight, which really adds to the dimensional look and using a darker colour of ink on one side for more contrast and dimension

I finished with 3 layers of the AJVD Merry Christmas die in black cardstock and topped it off with a layer cut from holographic cardstock from lawn fawn.

Friday, 11 June 2021

Rainbow Limes! (5K Together Video Hop)


Today my video combines two of my favourite things - LIMES and rainbows! 

I've been invited to celebrate with Erica and Maria as part of a video hop so be sure to watch how I was inspired by each of them and how I used two of my favourite direct-to-paper ink techniques. 

Then hop and comment for a chance to win! (details below)


Hop Details:


Comments must be left (on YouTube, not here) by June 23rd at 11:59 PM Pacific time. Winners will be announced on June 25th on both Erica’s and Maria’s YouTube channels.


Monday, 7 June 2021

Black and White cards for Any Occasion


Today's video is all about using black and white to make high-impact cards for any occasion! I explored different techniques and supplies to add lots of visual interest! 

And after watching, if you're craving colour, you can head to Inkhill Revival, where Kerri is showing unexpected and exciting ways to add colour to your cards!

Start with my video here:


Sunday, 6 June 2021

Butterfly Birthday


Congratulations to this week's Featured Stamper, Jaque (jeddibamps).

I chose this card as my inspiration:

LIST: colours (pink, white, gold), white frame, intricate floral die cut, ribbon/yarn, bee, birthday sentiment

INCLUDE: white frame, pink and gold, white outline images, 

MODIFY: masked frame and sentiment strip, changed technique to stencil/blended ink, gold splatter, 


EXCLUDE: bee, ribbon/yarn

SPIN: Square card

I started by masking off a border and an area for my sentiment on a square piece of white cardstock. I laid the Butterfly Background stencil down and blended Tiki Torch, Pucker Up and Flirty Fuchsia through. Before I removed the stencil and the masking tape, I splattered Altenew gold watercolour over top.

When I removed the stencil, I stamped and heat embossed my sentiment, and then used Ellen Hutson Essential Square dies to cut a negative frame from the panel. I popped the frame and square up with foam tape and added some gold gems.