I chose this card as my inspiration from the gallery of this week's Splitcoaststampers' Featured Stamper!
LIST: Colours (black & white), Techniques (die cutting, stamping) Elements negative heart with diagonal strips of patterned paper, embossed dots, black ribbon and bow, stamped sentiment
INCLUDE: black, white, die cutting, stamping,
MODIFY: die cut 'scribble heart' - scribbles are like diagonal strips, gold splatter instead of embossed dots, die cut sentiment on the heart
EXCLUDE: ribbon, bow
SPIN: square card
I don't often make cards in just black and white, but this inspiration really caught my eye. I pulled out an unused heart die and embraced the graphic look of it. I stacked up 3 instead of having a negative die cut, and I splattered gold watercolour on the top layer. I added a simple love die cut sentiment, along with a tiny stamped 'you'.
Today I'm sharing 9 quick and easy ideas for using up those backgrounds you have on hand. And if you're a person who doesn't make backgrounds, these ideas work with patterned paper, too!
I chose this card as my inspiration from the gallery of this week's Splitcoaststampers' Featured Stamper, Amber!
LIST: Colours (white, grey, silver, pink, yellow), Techniques (stenciling, embossing, stamping, colouring, die cutting), Elements (partially stenciled brick wall, stamped outlines, silver embossed panel, sheer ribbon, coloured/cut flowers, one word die cut sentiment)
INCLUDE: white, silver, pink, yellow, embossing, die cutting, flower, basic layout of colourful focal image in the centre of a white card
MODIFY: focal image is colourful, embossed heart with silver frame instead of flowers, background is white on white die cut, square card, moved sentiment onto focal image
EXCLUDE: ribbon, stamping, colouring
SPIN: square card
Amber's simple, clean card with LOTS going on really caught my eye - especially the idea of using the outline stamped image, uncoloured, to create part of the background. So clever!
I needed to make some valentines this week, and I'm on a mission to start using up all the background panels I've created over the years so I started with an old alcohol ink panel with similar colours as my inspiration. I cut a heart from it and embossed it with an embossing folder. I also cut some small flowers from the panel to decorate my 'love' sentiment.
My background is geometric, but not bricks; I used an A2 coverplate die and then trimmed it with a square die, and created a square frame to give it a finished look.
I added a narrow silver frame to my heart for some shine and some gems for sparkle.
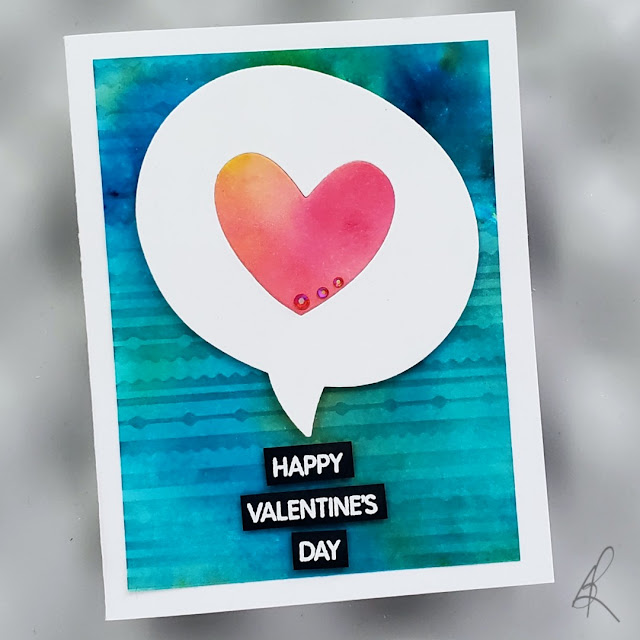
Happy Valentine's Day! This is a very simple card I made with a new background technique using my gel plate and watercolor powders (video coming later this week!).
When the background was dry, I used the Festive Stripes stencil and some Daydream ink to add some subtle texture to it.
I inlaid my heart (made with the same technique) into the speech bubble and added 3 little Rose Garden gems for some sparkle. Then I embossed my sentiment onto black cardstock for a pop of contrast.
If you love learning new techniques, check out the Card Maker Success Summit. It's free to attend, includes 25 speakers (including me!) and it starts on Thursday!
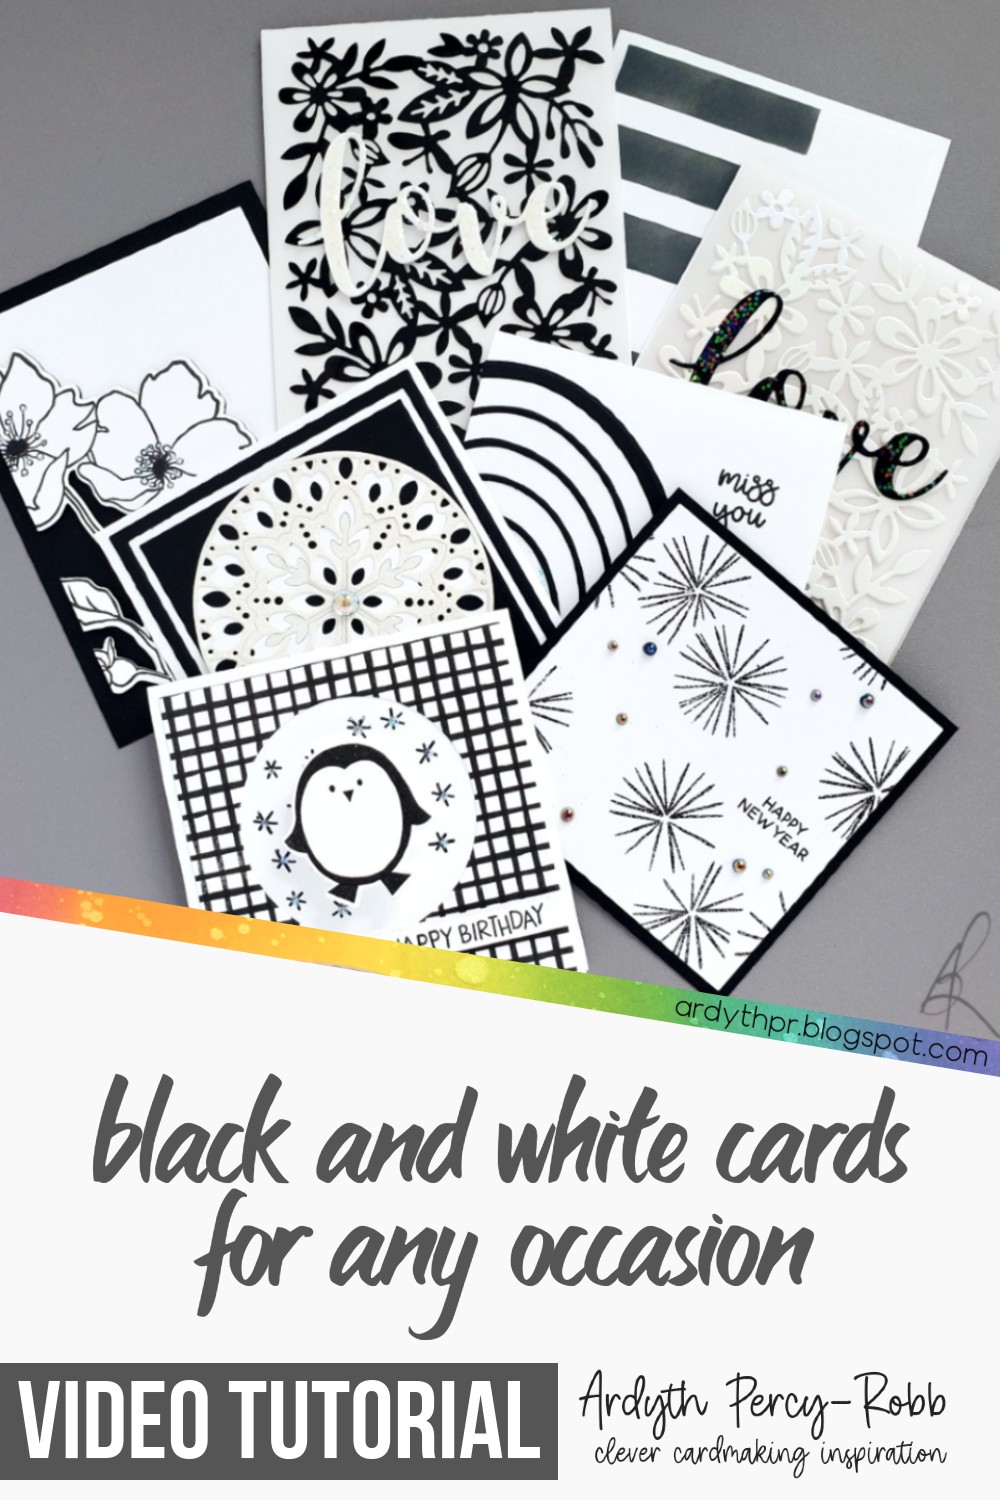
Today's video is all about using black and white to make high-impact cards for any occasion! I explored different techniques and supplies to add lots of visual interest!
And after watching, if you're craving colour, you can head to Inkhill Revival, where Kerri is showing unexpected and exciting ways to add colour to your cards!
Here's another card using new dies from the Suddenly Spring release from Altenew. See yesterday's post for Blog Hop and Giveaway details!
I cut the same die from Decorative Swirls twice from white cardstock, and flipped one over before blending ink on them. Then I embossed them both with an embossing folder.
I love how they kind of hook together to create a heart, and I finished the card off with a partial sentiment from the Slim Sentiments die set.
I made this very (VERY) simple valentine for my husband, using my Catherine Pooler inks and my GelPress gel plate! I love the 'not quite solid' look of this background. I used Black Jack, Sand Castle and Skylight for the background, and Samba, Rockin' Red and Tiki Torch for the die cut heart.
I have been enjoying this technique so much and I have a little IG video coming up next week so you can see how I do it (and a YouTube video is coming in the next few weeks!).
For the heart, I splattered it with gold watercolour and blended Cranberry Fizz ink along the edge for some depth. I added some Nuvo Crystal Glaze for shine and popped it up on the panel.
LIST: colours (teal, green, watermelon, white), big white heat embossed letters, love theme, dry-embossed hearts in the colour-blocked background, sparkly heart, sequins, watercolor, heat embossing (wow, there's a lot going on!)
I blended 3 colours of ink through the Scribbled Hearts stencil, allowing it to fade at the top and bottom. I trimmed the panel with 2 Essential Rectangles dies, to create the cut-out frame, which gives a similar look to a panel on a mat. I used a Posca Paint pen to splatter white over the panel.
I cut Classic Block Alpha letters from silver glitter cardstock and a small 'you' from white cardstock, which I added Serenade ink to.