Pages

Sunday, 31 October 2021

Spinning Happy Birthday!

Congratulations to this week's Featured Stamper, Jocelyn (JoBear2).

I chose this card as my inspiration:

LIST: Colours (red, blue, brown, orange), Techniques (die cut, stamping & colouring), Elements (rich background design, simple happy birthday sentiment, positive and negative die cuts, cute critter, twine bow)

INCLUDE: background, simple happy birthday, negative die cut element

MODIFY: colours, technique (salad spinner alcohol inks), layout

EXCLUDE: cute critter, bow

SPIN: add jewels

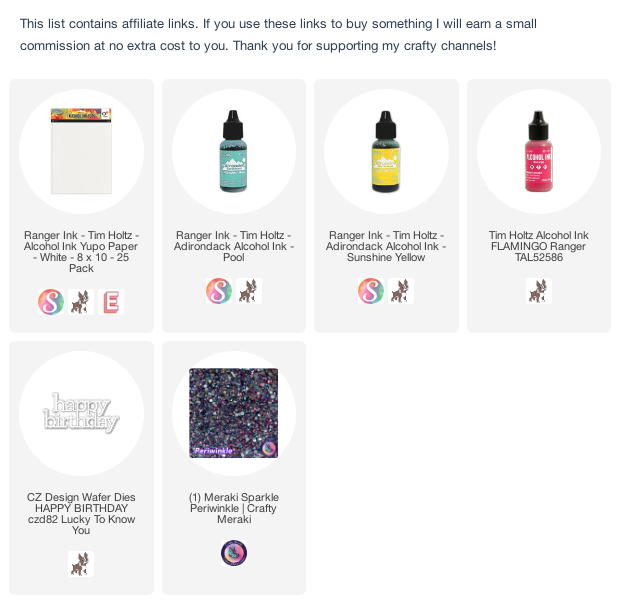
I started by creating my background paper with alcohol inks and a salad spinner (thanks, Karen Dunbrook for this easy and fun technique!).

I have found that if you layer up your colours by using one colour at a time, spinning and letting it dry before adding the next one, rather than dropping them all in at once, you get a more defined colour pattern like this one. Not that you can really control it! lol!

For the negative die cut element, I used Ellen Hutson essential rectangles dies to create a negative frame. This adds interest and definition without actually cutting down the background, and I really love the edges of this panel!


Thursday, 28 October 2021

Cardmaker Success Summit Christmas in July - content FLASH SALE


You may remember that in July, I was part of the Card Maker Success Summit (Christmas in July), which featured over 25 amazing speakers with TONS of inspiration for getting your holiday projects done!

If you missed the summit (or didn't sign up for 'lifetime' VIP access to the videos), we've opened the vault and you can get access to all the video content for $49 (for the next 2 days only)! 

What's included:

  • Lifetime access to all 25+ presentations

  • 298 page Holiday Card Project Workbook with a card project planning calculator ($59 value)

  • Premium bonus content from our host, including ($100+ Value):

    • Craftroom Organization Guide Workbook

    • Free Card and Technique classes

    • Exclusive discounts to Stamp Me Some Love Shop 

  • Plus you gain access to the Card Maker Success Summit’s attendee facebook group which is currently closed to new members. 

Click here to get access! 

My video presentation is full of tips for mass-producing Christmas cards and getting them done quickly. I made 24 cards in the 4 designs above in 2 hours!

And there's more (from me):

Click here for a FREE checklist for making Magnificent Multiples in Minutes! This checklist is a summary of some of the best tips in my video! 


Wednesday, 27 October 2021

Out of this World Spray Techniques


This galaxy came from a failed attempt to be like Tiffany! lol! If you don't know Tiffany, she is an extremely talented crafter and she loves to make gorgeous backgrounds with sprays. 

She's also one of the 5  teachers at the Eat Sleep Crafty Retreat (I'm also teaching!) and I am looking forward to learning her technique so that my failed attempts don't have to be covered up (although, I think this galaxy is a pretty good recovery! lol!)

I sprayed Wilted Violet, Twisted Citron, Salty Ocean and Peacock Feathers, and spritzed with water. I did it 3 times, here's the kind of thing I ended up with: 


I covered up one of the panels with navy, gray and black inks and then added some stars by splattering white and silver paint over top.

I'm looking forward to learning more tips and tricks for Tiffany's technique PLUS there are lots of other cool techniques being taught:


See you there!


Monday, 25 October 2021

Evolution of an Idea (AND FREE Eat, Sleep, Crafty Retreat sneak peek class!)


Sometimes, it's fun to start with a simple idea and then just see where it can take you! That's exactly what I did with these 4 anniversary cards!

I needed them quick so I thought I would simply use this Studio Light heart die, some metallic cardstock and a piece of gray cardstock (made with my gel plate and Catherine Pooler inks).

Pretty. But it needed more pop! So I cut the die again from red cardstock, so I could inlay a few of the hearts.


Then I cut the die from the gray cardstock to get 2 cards using that one panel. First, I used the red outline 


And finally, I knew I had to do a full inlay:


This is a great die from Studio Light - you can use it on its own, or fill in some or all of the pieces for a different look. Hearts like this will never go out of style and they make for very quick and easy anniversary and Valentine's cards.


If you love to learn new techniques like die-cut inlay, fancy folds, working with alcohol inks and more, join us at the Eat Sleep Crafty Retreat on November 13-14

These topics are taught by me and 4 other amazing crafty teachers! The classes will be live via Zoom (so you can craft along and ask questions when you need to!), and they will be recorded so you can refer back to them, or watch them later if the time doesn't work for you.

AND if you want to 'try before you buy', there's a FREE class happening this Wednesday at 4 pm ET (and it will be recorded in case that time doesn't work for you!) Click here to sign up!


Sunday, 24 October 2021

Oh Holy (Rainbow) Night

Congratulations to this week's Featured Stamper, cheermom.

I chose this card as my inspiration:

LIST: Colours (rainbow, white), Techniques: (stamping, colouring), Elements (lots of white space, night sky, row of multi coloured houses, black silhouette in sky)

INCLUDE: rainbow colours, white space, night sky, houses

MODIFY: colouring to ink blending, add dark sky, change santa to Bethlehem star

EXCLUDE: images in foreground

I made 32 of these cards in about 3 hours using an assembly-line type process. I cut all the card bases, then the panels, then I stamped the Bethlehem stamp with copic-friendly ink using my MISTI. I left the stamp on the MISTI door.

Then I did all the ink blending, one colour at a time on all 32 panels. I created a mask from acetate so my rainbow inks wouldn't go beneath that curve.

To finish it off, I added the star and sentiment to the MISTI door and re-stamped all 32 panels with Versafine Onyx ink, to give it a deep crisp outline.

Saturday, 23 October 2021

One More...


Can you stand one more card using Catherine's Pinwheel Stencil? lol!

This time, I blended then shifted (like I did with these cards), and then I flipped it over and blended and shifted. So there are 4 layers of ink here, forming a really neat geometric pattern.

I finished with a sentiment from All Around Wishes  and an old dotty border stamp (from Woohoo!) to help distract you from the fact that my white lines aren't 100% straight... ;-) Did it work?

Thursday, 21 October 2021

Turning Pinwheel Cards


 Yesterday, I played with the Pinwheel stencil from Catherine Pooler by shifting it, and then I wondered what would happen if I used it in my Stencils 360 tool!

It's easy to use 6 inch square stencils by taping the stencil to the 6" square clear paper guide, rather than one of the stencil guides, which have circular holes for the Stencils 360 round stencils.

This stencil gave a beautiful kaleidoscope look with the same 3 colours as yesterday's cards. I made 2 and used different simple shapes to finish and frame them, along with some Blue Illusion gems from Crafty Meraki.


As I looked at these pretty cards, my brain thought 'fractal' and that meant I needed to make a Frozen-inspired one with just one colour, Cummerbund:

So pretty! I added a stacked up Catherine Pooler snowflake die and some Dew Drops from Little Things from Lucy.

Wednesday, 20 October 2021

Simple Stencil Shifting


I am in love with these colours! I created these cards with the same 3 primary colours (Sauna, Rouge and Daydream) as this card, and a simple stencil shift with the Catherine Pooler Pinwheel stencil.


1. Tape stencil to white cardstock. I'm trying out the 'corner' method with my Waffle Flower Water Media Mat - so far, so good! Blend Sauna ink in a circular motion through 3 of the pinwheels

2. Blend Rouge ink through 3 more pinwheels. The circular motion will ensure a blend between the overlapping pinwheels.

3. Blend Daydream ink through the last 3 pinwheels. 

4. Remove stencil

5. Move cardstock to the left by one row. Turn stencil so that a different colour of ink is in the top corner (this saves you having to clean it). Tape it down to the cardstock (note the stencil is still in the corner, but the cardstock is not.)

6. Blend the inks through in the same places, with the same circular motion.

7. Remove stencil. Ooh and ahh at the beautiful blends!

8. Finish cards.


To finish my cards, I created sentiment circles with 2 layers of white cardstock. I blended the same 3 colours on the larger circles to create frames. The sentiments are from a retired C9 set (Many Mandalas). They are placed over the 'smudgy' areas on each panel! lol!

I chose 3 different 'framing' options - one with the 3 colours, one white and one solid black. Do you have a favourite?

I added some iridescent black pearls from Little things by Lucy.

Sunday, 17 October 2021

Stencils 360 Sunflowers


Good morning! I was playing with my Stencils 360 Tool the other day to create this fabulous fall sunflower card! (Good news! Now also available at Scrapbook.com and Simon Says Stamp! Affiliate links below).

I started by creating the first sunflower (3:00 on the card) in the centre of an 8x8 piece of white cardstock and the smallest of the Sacred Lotus stencil set. 

I masked some of the petals, then moved my paper to create a second sunflower (at 7:00) and then moved it again (to 11:00). There's only one colour of yellow ink on those petals - all the dimension is created by blending darker at each end of the petals and letting it fade in the centres.

My dark brown sunflower centres were created freehand with Icing on the Cake ink and a sponge dauber. Love those 'fluffy' edges!


Also, if you didn't know already, this fun tool is now available at Scrapbook.com and Simon Says Stamp, so if shipping from Canada has made you hesitate in the past, now is a great time to give it a try!


Saturday, 16 October 2021

More Meraki Fun!


My latest video shows some easy ways to stretch (and shrink) mini-slim dies to use on different sized cards, and here are a few more ideas.

This time I'm working with the new Starry Night die from Crafty Meraki.

I started by creating a panel of inked blue/green cardstock with my CP Mini ink pads in Mardi Gras, Daydream and Juniper Mist. Then I cut the blue panel as well as a white panel with the die. 

I inlaid the blue 'extra' pieces around the white flowers, but just glued the blue flowers onto another panel of white cardstock. (see top left photo in both collages below).

With the white panel, I created two mini-slim cards by cutting it with one of the Frameworthy mini slim frame dies from a previous release. There are a lot of options!


With the blue, inlaid panel, I used Ellen Hutson Essential Squares die to create a smaller framed inlaid panel for my 4 1/4" square card , and then with the leftovers, created a panel for a white A2 card.


All 4 of the cards got loads of sparkle from the new Emerald and Blue Lagoon gems.


Thursday, 14 October 2021

Eat, Sleep, Crafty Retreat!


Die cut inlay is one of my favourite techniques!  I love the smooth look you get, and there are so many different ways to accomplish it, from very basic to advanced.

This card uses dies that make inlaid die cuts so simple because there are outline and solid dies, so you have a base that works perfectly to hold the outline and the inside pieces.

I cut 9 leaf bases, 9 outlines from gold satin cardstock and 9 outline pieces from white (for the leaf-insides). I inkblended the inside pieces with some colours from Catherine's Spa collection.

Then I put glue on top of each base, and laid the gold outline on it, and put the inside piece on each leaf.


If you want to craft LIVE (via Zoom) with me to learn more about inlaid die cuts and other techniques from other teachers, be sure to check out the information for the Eat, Sleep, Crafty Retreat here!

We have 5 fantastic teachers, 7 LIVE classes so you can craft along and ask questions as you need to PLUS open crops, Card Wars and giveaways!


Here's an overview of the schedule:

Hope to see you there!


Wednesday, 13 October 2021

Lego-Inspired Cards for Teen Boys


 Teen. Boys. These two words strike fear into many cardmakers' hearts, mine included. In my extended family I have 3 nephews who have birthdays in late autumn, and when I find a design I like, they often all get the same card (even the twins! lol! I made 2 15 cards and 1 14 card)

We love Lego, and we even watch YouTube videos about the latest sets. This design was inspired by the Lego World Map kit:

I focused on the colours and the dots.

I started by stamping an old MFT background stamp (Simply Circles) onto white cardstock, and then I used Copic markers to colour in the dots. I finished by filling in the white spaces between the dots with a black marker, trimming the panel and gluing it to a black card base.

I made a mistake on my 4th panel and had to cut it down, and made this one:


Monday, 11 October 2021

Crafty Meraki October Release Video Hop & Giveaway!


Today, I'm part of a fun YouTube hop (details below) to celebrate the #merakicraftober new release at Crafty Meraki ! This release is sure to make your Mini Slimline loving heart sing! Plus the BRAND NEW gems in this release are going to leave you dazzled!  To celebrate  the #merakicraftober release, we are having a giveaway!  One lucky winner will win $100 worth of Crafty Meraki products!

Watch my video here, and then hop and comment for a chance to win (see details on my YouTube description or below)!


For a chance to win:

1. Subscribe to my channel  and Crafty Meraki - https://youtube.com/c/CraftyMeraki

2. Like my Video

3. Leave a comment on each stop on this Hop (more comments = more chances of winning)

NEXT: 

PREVIOUS: 

One lucky winner will be chosen randomly from the comments left on each participating designer’s channel.  Winner will be announced on September 6th -  on YouTube and on the Crafty Meraki Instagram page - instagram.com/Crafty_meraki 

Open Internationally.

Giveaway accounts do not qualify.  Don’t subscribe to unsubscribe - that’s not cool! This giveaway is not sponsored, administered, or associated with YouTube.  By entering, entrants confirm they are 13+ years of age, release YouTube of responsibility, and agree to their terms of use.