Pages

Showing posts with label Neat & Tangled. Show all posts

Saturday, 24 December 2022

LIMES: Glory to the Newborn King


Welcome to this week's LIMES inspiration post!

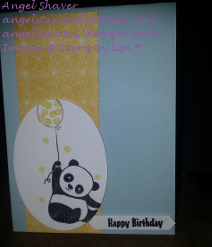
I chose this card as my inspiration from the gallery of this week's Splitcoaststampers' Featured Stamper!


LIST: Colours (white, yellow, red, gray). Techniques (stamping, masking) Elements (coloured angel with yellow 'glory', stamped sentiment, red frame)

INCLUDE: white, yellow, stamping, masking, angel with yellow 'glory', stamped sentiment

MODIFY: angel on the left, sentiment on the right, blue instead of gray, masked/blended 'frame

EXCLUDE: red

SPIN:

Merry Christmas! I was inspired by this glorious angel card,  but made mine a little more clean and simple, and left the angel uncoloured. 

When masking her to blend her 'glory', I realized that there are no rules that say that a mask has to be in one piece! I cut her halo separately from her body and that made it so much easier!

I laid a rectangle stencil over top and blended blue inks to create the sky, to give some definition to the card, and I love how even though it's not filled in completely, your brain can "see" the full rectangle.

I made multiples of this card as part of my Church Christmas project this year.

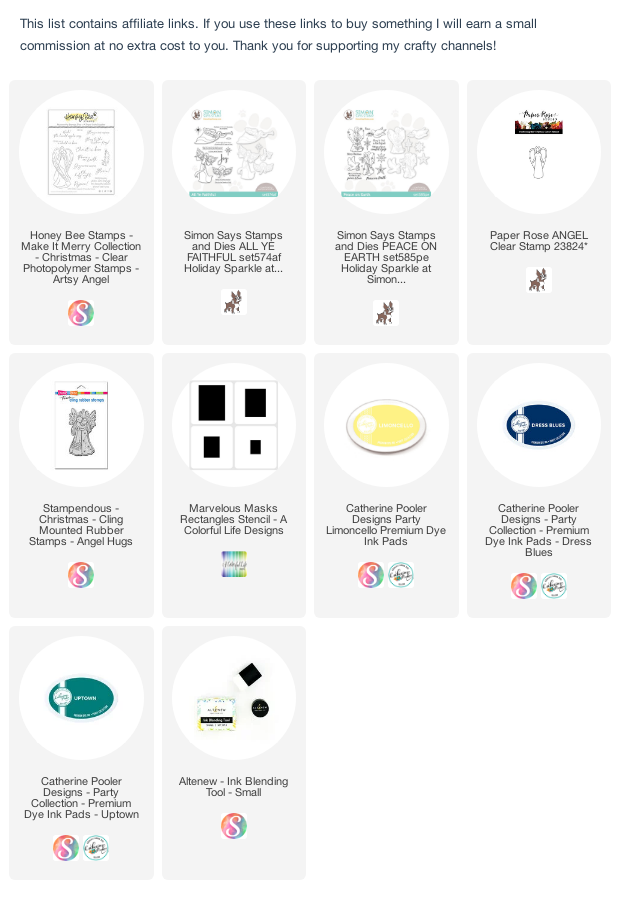
These stamps are both retired, (Stampendous Angel, Neat & Tangled sentiment) but I've linked similar ideas below.


Friday, 26 October 2018

Neat & Tangled Guest Designer - Holiday Happiness


Today is my final post as the October Guest Designer for Neat & Tangled. I've had so much fun this month, and I want to say a big thank you to Danielle and the team for inviting me!

I used a stamp from Flower Medallion Builder to create a snowflake. I started by creating a mask using the 6 petal flower in the set. I placed it onto a white panel and used it as a placeholder and guide for stamping the 6 arms of the snowflake. (And that just saved me a whole lot of math! LOL!)

I used a rock-n-roll inking technique with 3 blue inks to create some visual interest and then finally I over-stamped each image with embossing ink before sprinkling sparkly embossing powder over.

I used the darkest blue ink and a sentiment from Beary Merry and embossed it as well.

I blended the lightest blue ink around the edges of the card to complete the frosty look.

Here's a video:


And it's your last chance to use the code below for 10% off your order at Neat & Tangled!


Friday, 19 October 2018

Neat & Tangled Guest Designer - Tis the Season


Good morning! I'm excited to be back with my second post as the October Guest for Neat & Tangled!

Today I've created a fun winter scene using images from 5 different stamp sets, some masking, ink-blending and Copic colouring!

I started by creating a rough 'sketch' of my card on a scrap piece of paper, by stamping the images where I wanted them - no masking, just quick layout planning. I worked out in my mind which images were in front and which were behind and numbered them, in the order I would need to stamp and mask them.


Then I had to cut out all those masks! Once I had that all finished, I stamped the images, in order and placed their masks over top. 

When the scene was completely masked, I created snowdrifts with some post it tape and blue Catherine Pooler ink. Then I blended more ink over the top of the card to create a bright blue sky.

Then came the big reveal - I've been doing it for years, but it's still magic when all the masks come off!

Next was a whole lot of Copic colouring. I kept it simple - a bit of shading for dimension and a limited colour scheme. I added some details with a white gel pen and some Stickles for sparkle.

Here's a video:


Don't forget that you can still use the code below for 10% off your Neat & Tangled order!

Stamp Sets:
Oh Deer
Santa's Wonderland
Into the Woods
Beary Merry
Get Yeti


Saturday, 13 October 2018

FS610 - Happy Birthday


Congratulations to this week's Splitcoaststampers' Featured Stamper,  Angel Shaver (MonkeyDo). I chose this card as my inspiration:


I focused on Angel's:
-bear
-blue background
-birthday theme

I changed:
-technique (watercolour background)
-colours (changed yellow to rainbow)
-balloon to gift, panda to bear
-layout

I created my blue background with Zig Art & Graphic Twin markers in various blues, scribbled on a craft mat, spritzed and then picked up on the watercolour cardstock. This is similar to last week's card for the Ellen Hutson release - video here.

I then cut it with a pierced square mat and used a curved landscape die to cut off the bottom, similar to this card. I am often unsuccessful at embossing sentiments in white onto a darker background, so I love this simple trick of creating some white space for a sentiment!

I stamped the Neat & Tangled bear and coloured him and his present with a rainbow of Copics. The sentiment is from a new Neat & Tangled set. The "C" on the tag is the first initial of the 15 yeard old girl who received this card - I did it by hand with a Copic multi-liner.

I used:

Friday, 5 October 2018

Neat & Tangled Guest Designer - Maple Thanks


Good morning! I'm excited to be the October Guest Designer at Neat & Tangled! (and there's a bonus for you, too - keep reading for a discount code!)

Today is my first post and I decided to make a warm, autumn thank you card using this beautiful Maple Thanks stamp (and matching dies!)

I started by stamping the leaf twice on a panel of white cardstock, using Copic-friendly black ink. I coloured the leaves with 5 colours, making sure to get a good mix over each leaf. Then, I put the panel back into my MISTI and restamped the leaves with Versafine Clair Nocturne ink before embossing them with clear embossing powder. This gives these leaves a stained glass look. I coated them lightly with Diamond stickles for some sparkle and set them aside to dry.

I cut a tag using the Classic Tag 1 die and stamped a bold thanks sentiment from the Medallion Flower Builder set with a light gray ink for a tone-on-tone look. I used another sentiment from So Many Sentiments to complete the thought, and stamped it  with dark brown ink.

I placed the die on each end of my panel and cut about half of each leaf. This allowed me to get a square die under the cut edges of the leaves to trim the panel to fit onto my 4.25x4.25 inch square card. I glued the panel directly to the card base, but popped up the edges of the leaves for some dimension. The tips of the leaves hang over the edge of the card, but it will still fit into a standard A2 envelope for mailing.

Here's a video:


And here's a special code that you can use to get 10% off your order at Neat & Tangled! Enjoy!


Monday, 16 July 2018

MCV104 - Calm & Bright


Here's my card for the current Muse: ChristmasVisions challenge where Kimberly gave us this inspiration:

I focused on Kimberly's:
-green/blue trees
-pink/yellow element
-snowdrifts
-blue sky

I started by stamping the snowflakes with Versamark and embossing with clear embossing powder. Next, I created my snowdrift mask with Post it Tape. Then I created a stencil and masks using a tree die and blended my trees, masking them so that some would appear to be behind others. I blended two colours of ink on each tree. Once the trees were done, I removed all the masks and blended the sky. Finally, I stamped my sentiment, popped up my panel and added Star Dust Stickles along the bottom edge and in the snowflakes for some sparkle.

I used:

Sunday, 3 June 2018

FS591, 30Day Day 3 - Awesome


Congratulations to this week's Splitcoaststampers' Featured Stamper, Janja! I chose these cards as my inspiration:


I focused on Janja's:
-gold frame
-striped background
-pink flowers with green leaves

I changed:
-combined the frame and stripes into a stamped, embossed background
-stamps flowers
-added a sentiment

These flower images are part of our #30dayfriends exchange - they are stamped on Bristol with Versafine Clair ink and embossed them with clear embossing powder. I coloured them with my Zig Art & Graphic Twin Tip markers (colours are linked below).


For the background, I embossed Art Deco onto white cardstock with gold embossing powder. To make sure that my sentiment matched, I cut it out of white cardstock, adhered it with temporary adhesive to a piece of scrap paper and tapped Versamark onto it. I then sprinkled gold embossing powder over the whole thing and heated it. When it was cool, I removed it from the scrap paper and used liquid adhesive to adhere it to its shadow. Here's the left overs..... that gives me an idea!


I used:


Friday, 11 May 2018

Muse 265 - Hooray!


Here's my card for this week's Muse Card Club, where Anita gave us a birthday inspiration on her birthday!


I focused on Anita's:
-colours
-'layered' sentiment
-celebration theme

I started by blending Aquatini, Something Borrowed and Flirty Fuschia inks from Catherine Pooler on a panel, fading them out to white. I spritzed the panel with drops of water.

Then I cut the Hooray sentiment in Catherine Pooler Smoke and the shadow in white (I also did it in the reverse to see which arrangement I liked better, but with all the colour, I needed some white space!).

I cut the bottom edge of the blended panel with the shadow die so that the sentiment would fit into the blended panel and then decided to pop up the Hooray. Then I decided to add more to my sentiment. Next, I decided to cut out the Seeing Stars die from the panel and when that was done, I decided to lay the stars back into the panel, popping them up. It was a little fiddly, but I like the subtle texture. Finally, I coated the smoke Hooray in Disco Ball Stickles (silver with colourful sparkle in it). 


Saturday, 5 May 2018

MCV99 - Adore


Here's my card for the current Muse: ChristmasVisions challenge, where Kimberly gave us an elegant inspiration:


It's elegant, but I was stumped for a while! I was really focused on Santa and the colour. I didn't think my Santas would work, so I turned to the other Christmas 'Big Guy'. Every year, I make 300 Christmas cards for my church and my parents' church, and I try to spread the creating through the year, to avoid a panic. Well, this is my first one for 2018. Only 299 to go! lol! 

I focused on Kimberly's:
-copper and cream colour scheme
-classic layout of image over sentiment
-scallop
-horizontal elements

I simply stamped the image and sentiment with Versamark and then heat-embossed with copper embossing powder. 

I masked the fold of my card based and inked up about an inch of the bottom of the card front directly with my Versamark ink and embossed that with coper as well.

I cut a scalloped edge with a Catherine Pooler rectangle die and popped it up on the card front so that the copper shows along the bottom.

I used:

Monday, 5 March 2018

Happy Birthday, Kate!


Today's my daughter's 15th birthday! I was excited to finally use some Neat & Tangled goodies that I haven't been able to get to, along with my favourite Catherine Pooler inks to make this card for her.


Happy Birthday, Kate!


I used: