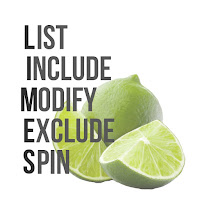
Welcome to this week's LIMES inspiration post!
I chose this card as my inspiration from the gallery of this week's Splitcoaststampers' Featured Stamper!
LIST: Colours (yellow, orange, pink, white, black), Techniques (ink blending, die cutting), Elements (square cards, daisy die cut, greenery die cut, die cut sentiment, white border)INCLUDE: yellow, orange, pink, white, black, square card, daisy, die cut sentiment, white border
MODIFY: gel plate background instead of ink blending, stenciled flower instead of die cut, sentiment location, white shadow around sentiment)
EXCLUDE: greenery
OK, I admit that I was inspired by these cards because they already contain so many of my favourite things - great summer colours, lots of die cuts, square card, pops of black and white borders.
But I changed it up. I wanted to show that inkblending a background with a gel plate, brayer and inks you already have is WAY easier than using blending brushes.
Tips:
-ink up the gel plate light to dark to avoid contamination on your ink pads
-use an 'in between' colour to help 2 colours blend smoothly
-get a brayer that's as wide (or wider) than your gel plate
-move the brayer slightly up and down as you're rolling to help blend the inks
-don't always put the paper down in the exact same place
-use up all the ink on the brayer (2 or 3 pulls)
-put down more ink if you want more intense colours
I added a stenciled daisy, a die cut hello sentiment and some black sequins with pink dew drops on top.


What wonderful backgrounds Ardyth, and a beautiful card
ReplyDeleteBlessings
Maxine
So happy the Stencils 360 set up is back in stock, I was able to grab it, and have been having so much fun. Thank you for the introduction.
ReplyDelete